3.02 - Establishing a new photo point
The location of photo points is dependent on the reason for setting it up. Some considerations include:
- stock grazing patterns
- accessibility
- being representative of dominant land types.
Dominant land type
If establishing a site in a paddock that does not have any existing sites, the site or sites should be located within the dominant land type(s). For example, do not choose an isolated black bluebush patch if it is not typical of the paddock. You should also avoid areas that are obviously atypical or are small areas of transition between different land types.
The land type chosen must also be one that gives a good indication of grazing impact and within an area that is preferred by stock.
Size and uniformity
The site should be uniform in vegetation, soil, slope and aspect, wherever possible. A site should not to include any area that is disturbed e.g. roadside. When the photo is taken it should include an area of approximately 100x100m, however you can record a larger area if you have identified other aspects of natural resource condition to be monitored.
Distance from water
When selecting sites, avoiding areas that are not regularly grazed, on stock pads and very close to watering points, unless you are specifically trying to record what is happening in these areas. The aim is to monitor areas where indicator species (usually palatable perennial plants) are present or are expected to occur. As the distance from water that cattle range from water varies greatly (depending on feed availability and animal class), a distance of between 2-4 km from watering points is an area likely to be grazed regularly and suitable for a photo point.
Access and relocation (finding the site in the future)
Sites need to be easily locatable, so it is wise record the distance from a permanent feature such as a gate or trough or you could use a GPS to capture co-ordinates for the site. It also helps if the site is located close (but at least more than 50m away) to a frequently travelled road/track.
A photo point marker, such as a peg or post, will help to relocate the site. It is also important to make sure that these posts are clearly visible to prevent being run over by vehicles or motorbikes.
Other influencing factors
Other factors likely to bias or influence the site vegetation should be recognised and avoided where possible. Avoid placing sites in or near the following situations:
- stock camps and cattle pads
- mechanically disturbed areas
- areas where water runs onto from roads and tracks, or where old track marks or erosion are evident.
Photo point setup
- Designate a site name or number when you set up your photo points the first time. Using numbers in sequential order or including the name of the paddock in the site name is the simplest method. Mark the location as accurately as possible on your paddock/property map.
- Directions to each photo point should comprise a distance and direction from a known point such as a water point or gate. Markers will consist of permanent/visible materials such as a steel picket/post.
- A second peg, is located approximately 10 metres (12 – 17 paces) from the marker peg. This is referred to as the sighter peg. The photograph should be taken from the marker peg towards the sighter peg. The sighter peg is positioned in the camera view such that the photograph area does not include more than 1/3 sky. It is also important to ensure the photo is not taken, facing into the sun, and obscuring the site. With this in mind, a photo facing south is the safest option.
- The photograph should be taken from the marker peg. Record/estimate a compass bearing between the marker peg and sighter peg. If additional photos are taken from the marker peg, the bearing should be marked with an additional sighter peg.
Taking the photograph
To take the photograph, stand behind the marker peg and centre the camera view on the base of the sighter peg as shown in Figure 3 and Figure 4.
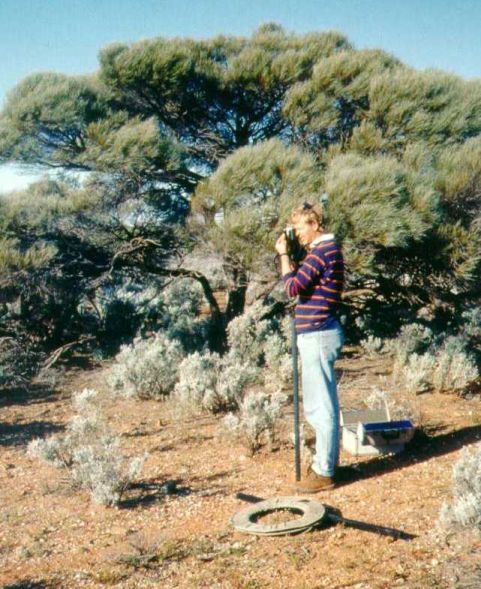
Figure 3: Taking a photograph, standing at the 1st (marker) peg
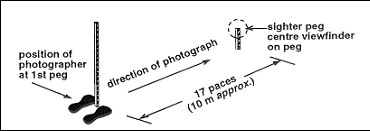
Figure 4: Directions for taking the photograph
Storing your photo point records and photos
It is important to keep a record of what and where and date the photo has been taken. With digital recording and filing systems, it is relatively easy to download your digital photos straight onto your computer. Suggested criteria for filing your photos include the following:
- site name or number – designated when you set up photo points the first time
- date (dd/mm/yyyy)
- paddock
- land type
- anything else you consider to be important.
It is best to download photos as soon as possible after taking them to ensure that this job gets done before the photos are forgotten and maybe inadvertently deleted.
Further information
Hacker, R., Beange, L., Casburn, G., Curran, G., Gray, P. & Warner, J. (2005), Best Management Practices for Extensive Grazing Enterprises, NSW Department of Primary Industries, Orange.
James C and Bubb A 2008, WaterSmart Pastoralism™ Handbook, Desert Knowledge CRC, Alice Springs.
Daryl Green, Rob Richards, Dave Hart and Ian Watson (2001), Rangeland monitoring, condition assessment and resource inventory activities in New South Wales, Report prepared for the Rangeland Theme of the National Land and Water Resources Audit, NSW Department of Land and Water Conservation and Department of Agriculture, Western Australia.